I saw this video yesterday where Claudine Hellmuth and Tim Holtz were using his masks and embossing the sticky side of her Sticky Canvas. Well wouldn't you know I had some cheap sticky back foam that didn't sell at my garage sale a couple weeks ago. So I took a break right then and there to see if it would work the same and it did. Now I am glad it didn't sell.
Uncover the sticky side of the the foam. Lay whatever mask you have laying around and start working the embossing powder all around the mask. Knock off the excess powder and remove the mask. Make sure to remove the mask. Heat with the heat gun. Now place a coordinating color of powder on the rest of the sticky area. I love the way they turn out and cheaper than heck to make custom embellishments.
Showing posts with label up-cycling. Show all posts
Thursday, September 30, 2010
Sunday, August 1, 2010
How to use left over beauty care items for scrapbooking~
So I have been meaning to post this tutorial all week, but with my sister in the hospital I never got to it. Finally I found time today to take pics and such for it when my friend called and said she was in the hospital all morning. Um.... okay all you guys I care about, just chill out with your weird afflictions.
If ever on some off chance you broke your eyeshadow and were down to the dregs of your nail polish. Don't throw it away make a couple cards with it and call your self eco. Using eyeshadow can be a cheap alternative to pigment powders. You will also need a VersaMark pad need to make this technique work, it will act as the binder.
Stamp your paper with a stamp inked with VersaMark. Then brush the eyeshadow over the VersaMark ink with a soft brush. This is a close up of it. It creates a soft sparkle.
You can also add a border with that nail polish you have. You know the one it's so far gone that it leaves clumps on your nails but you still keep it around. Put it to good use before throwing that sucker away. It won't matter about the acidity because you are using it for cards and they're temporary, so just go with it. You will want to be sure to spray with a clear sealer to set it all.
There you have it, a makeover for your paper. Enjoy!!
Linking up to ~
If ever on some off chance you broke your eyeshadow and were down to the dregs of your nail polish. Don't throw it away make a couple cards with it and call your self eco. Using eyeshadow can be a cheap alternative to pigment powders. You will also need a VersaMark pad need to make this technique work, it will act as the binder.
Take your broken eyeshadow and break it up in to separate containers.
Stamp your paper with a stamp inked with VersaMark. Then brush the eyeshadow over the VersaMark ink with a soft brush. This is a close up of it. It creates a soft sparkle.
You can also add a border with that nail polish you have. You know the one it's so far gone that it leaves clumps on your nails but you still keep it around. Put it to good use before throwing that sucker away. It won't matter about the acidity because you are using it for cards and they're temporary, so just go with it. You will want to be sure to spray with a clear sealer to set it all.
There you have it, a makeover for your paper. Enjoy!!
Linking up to ~
Sunday, July 4, 2010
Happy 4th of July!
I was lazy again and decided instead of getting up in the attic and finding my decorations; I would just make some.
This is very simple to make with items on hand and adapted for any holiday. I did something similar to this for Halloween. To make the pleated circles, take 4 pieces of paper in equal size and fold them accordion style. Glue the strips together and then glue all the edges together in the center. For the red crepe paper use a running stitch along the bottom. Next you want to gather and pleat the crepe paper and sew the ends together. Glue on to your pleated paper circle. I had these vintage Americana milk caps. They were perfect to finish it off. I added a little ruffle of white crepe paper and glued it all together. I glued all the ribbon with Fabri-Tac. I added the feathers to honor our Native American ancestors since our land was their's first.
The pic's aren't the best. I swear my camera's begging me to get a better one.
Linking up to the wonderful weekly wrap up at
Friday, April 16, 2010
Well actually.....
Made this headband for sister today. Totally rocking the cheapness with this one. The whole thing cost under $0.75 cents to make and is so damn cute. I can't really get the pic to look right since I am still using the camera phone. The flower is the one I made out of pages ripped from a Boho magazine. The headband was a 4 pack from the dollar store, and the leaves were ones I had lying around for crafting. Glued it all together with E-600 from Eclectic Products. This glue is great for pretty much everything and is even safe for photographs.
This week Kiah has the week off for spring break. It has been busy with all the older daycare kids home from school. But I have had extra time in the evening, to make more background papers for the Artistic Mothers Group. This is so addicting and has been so fun. I have a huge drawer filled with stamps that I never use because I always mess up. For some reason when I was stamping my background paper I was able to stamp the whole dang thing without messing up. I think I was just so engrossed in the art aspect of it. I was able to just let go and create. It felt so good and I absolutely love my papers. It didn't even matter to me that I got paint on 2 of my favorite skirts. I will post pics of them tomorrow.
Thursday, April 15, 2010
Getting my hands dirty......
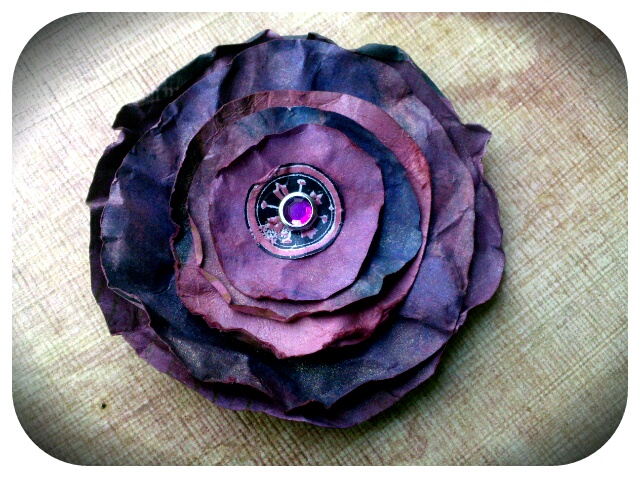
Who knew getting your hands dirty could be so much fun. This is the background paper I made for the Artistic Mothers Group over at Artistic Creations With Trudy. I love how gesso and some paint turned nasty color cardstock that I probably would have never used into something so pretty. At first it was hard for me to let go of trying to make it perfect and just enjoy the process. But I did and it was surprisingly easy. I am planning on making more. But only have room to do 1 or 2 at a time. Also pictured is a flower I made out of pages ripped out of Boho Magazine. Tinted them with glimmer mist and stuck them together with a brad. If you have never read Boho magazine, it is really good eco, grassroots, fashion, beauty mag. Very fun to look through the pages alone spark my creativity somethin' fierce.
Subscribe to:
Posts (Atom)